The same route on every case
Nine steps in a fixed order; each one unlocks the next. Anyone trained on it always knows where a case stands.
Aubé™ splint
A hard, full-arch occlusal splint with a flat occlusal table, from two intraoral scans. Each step calculates its result and shows it to you; you check it, correct it where needed, and export a print-ready STL.
For each step: what the software calculates, what you set, and what goes on to the next step.
Step 1 of 9
Create the case by choosing the product and dropping in your intraoral scans, STL or PLY.
Step 2 of 9
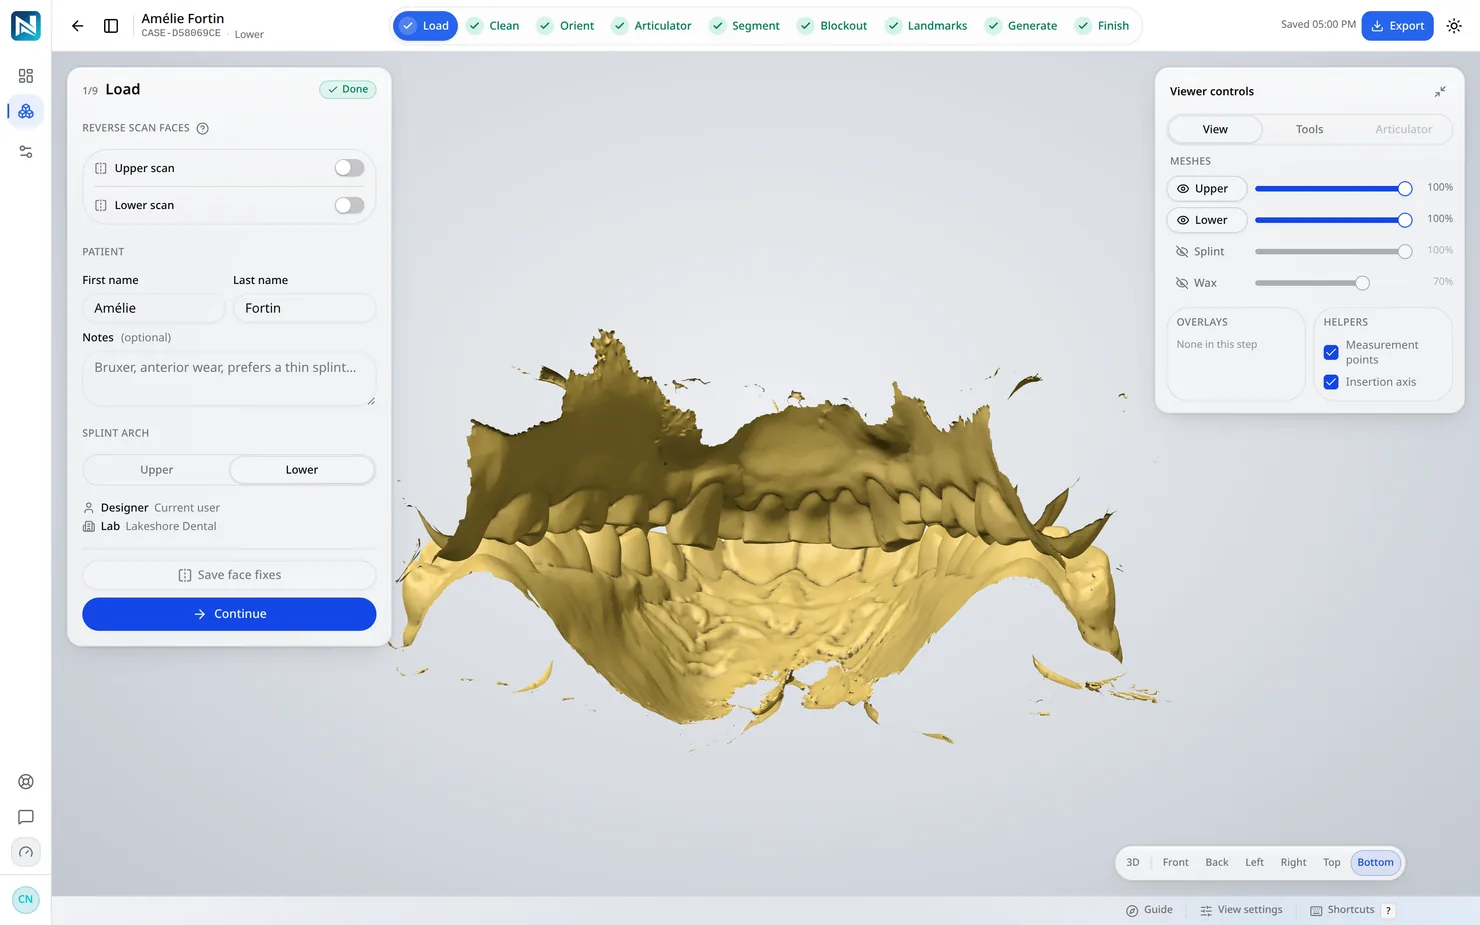
Automatic cleanup removes loose fragments and spikes, fills holes and closes the mesh.
Step 3 of 9
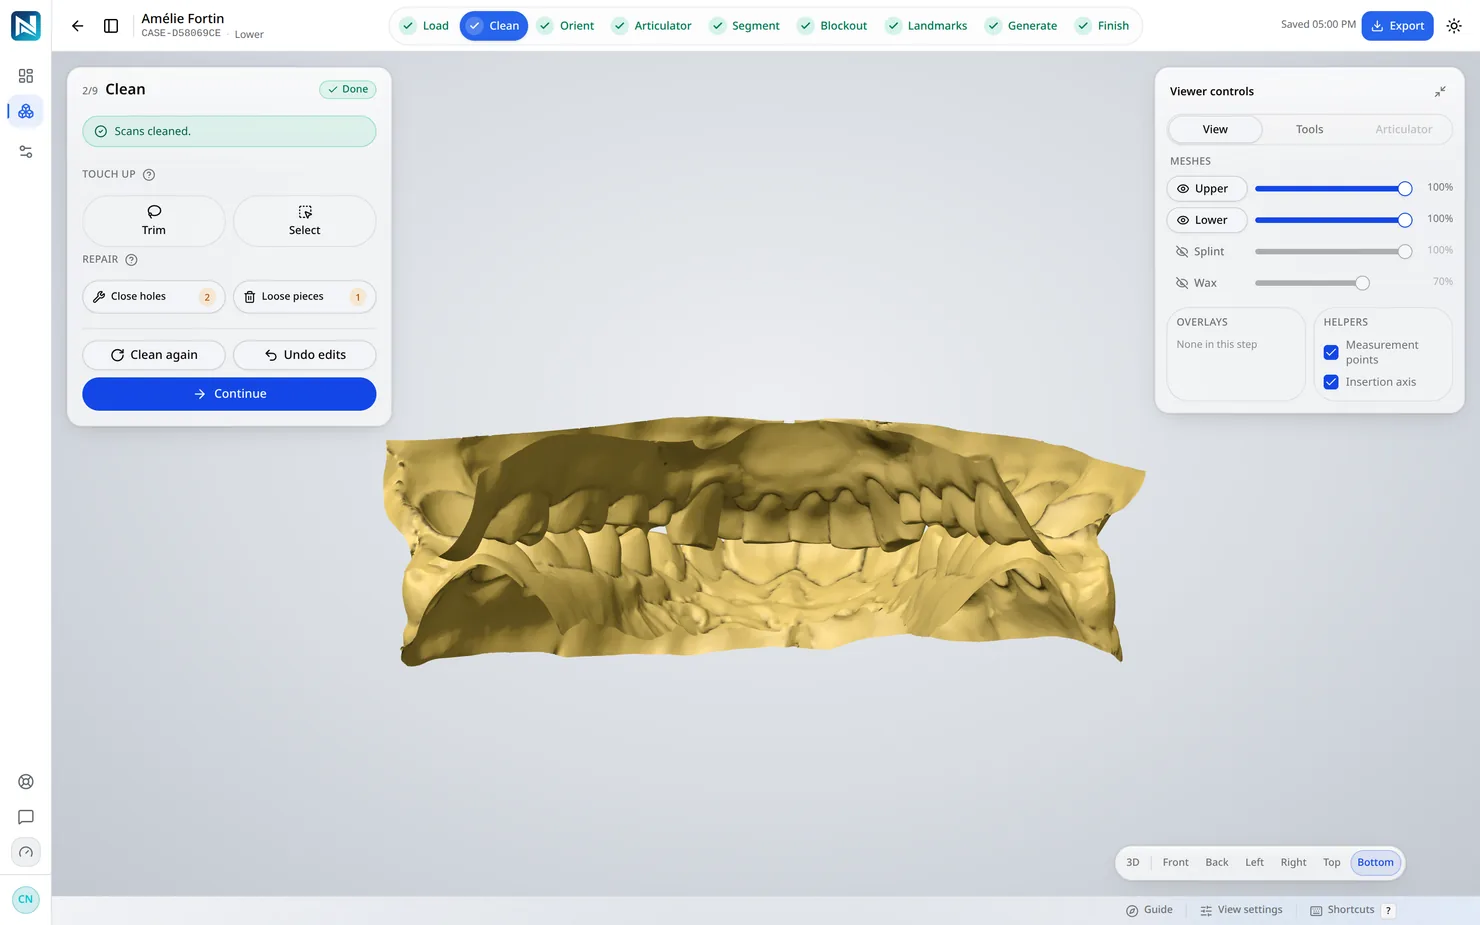
The occlusal plane is estimated automatically.
Step 4 of 9
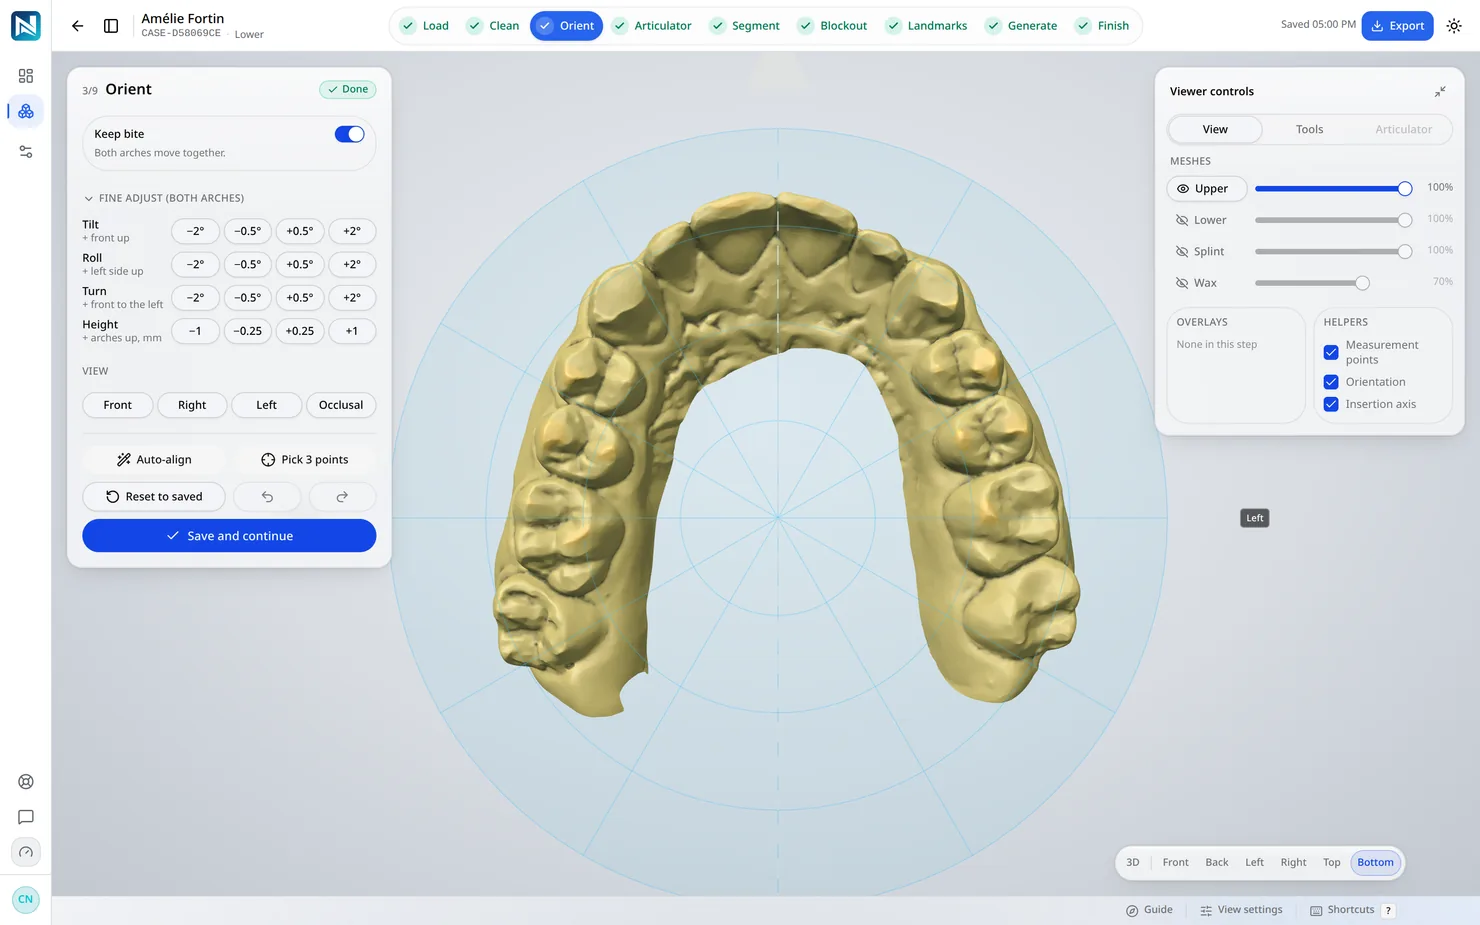
The arches are brought into occlusion, onto the bite registration if there is one, with a fit report.
Step 5 of 9
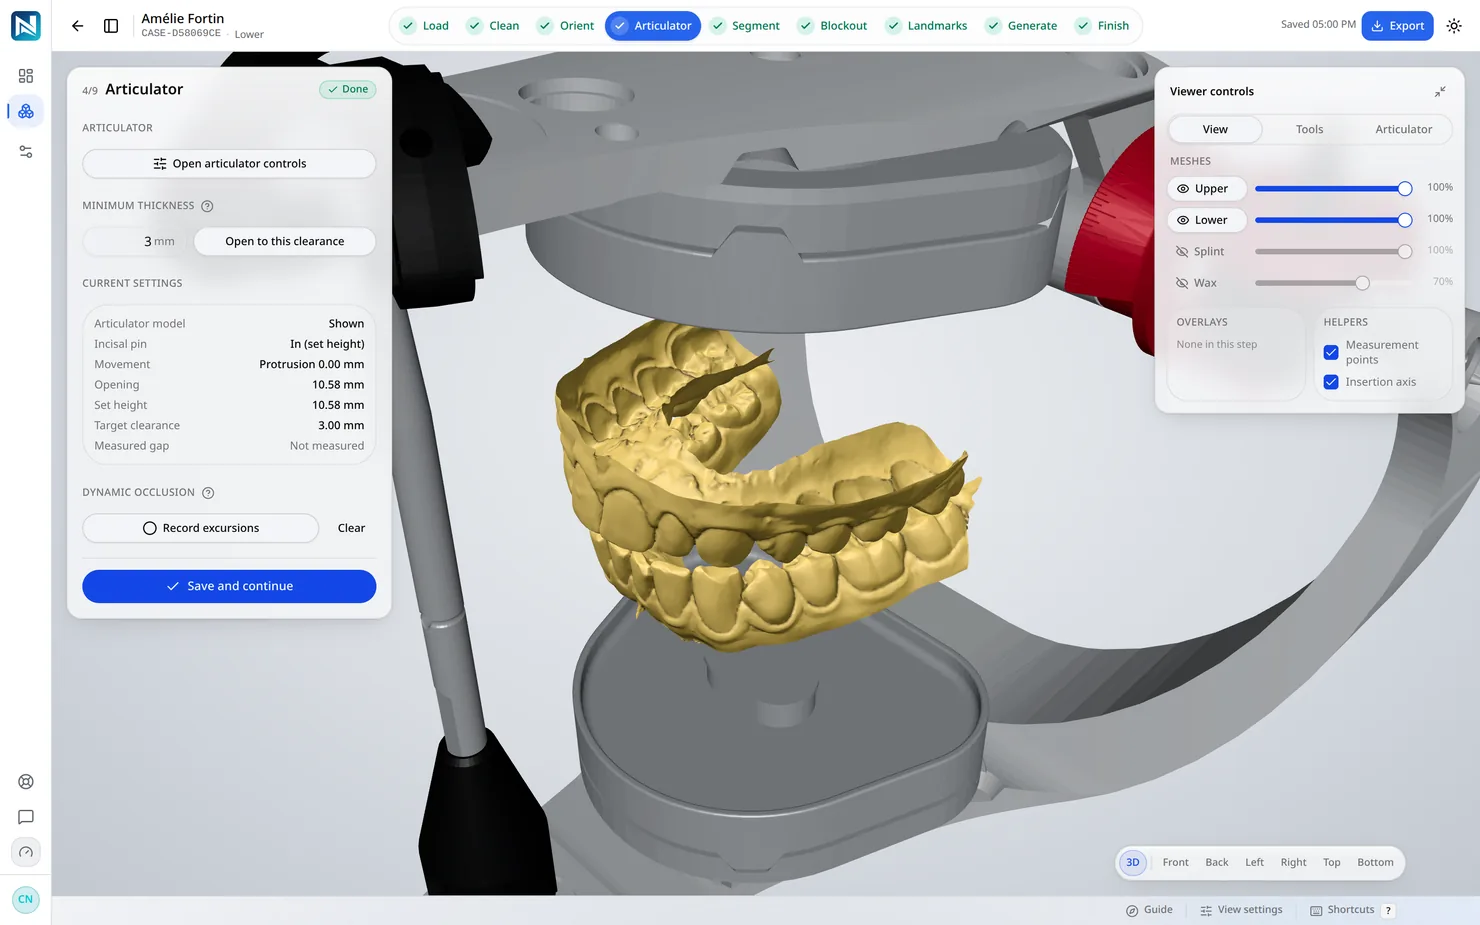
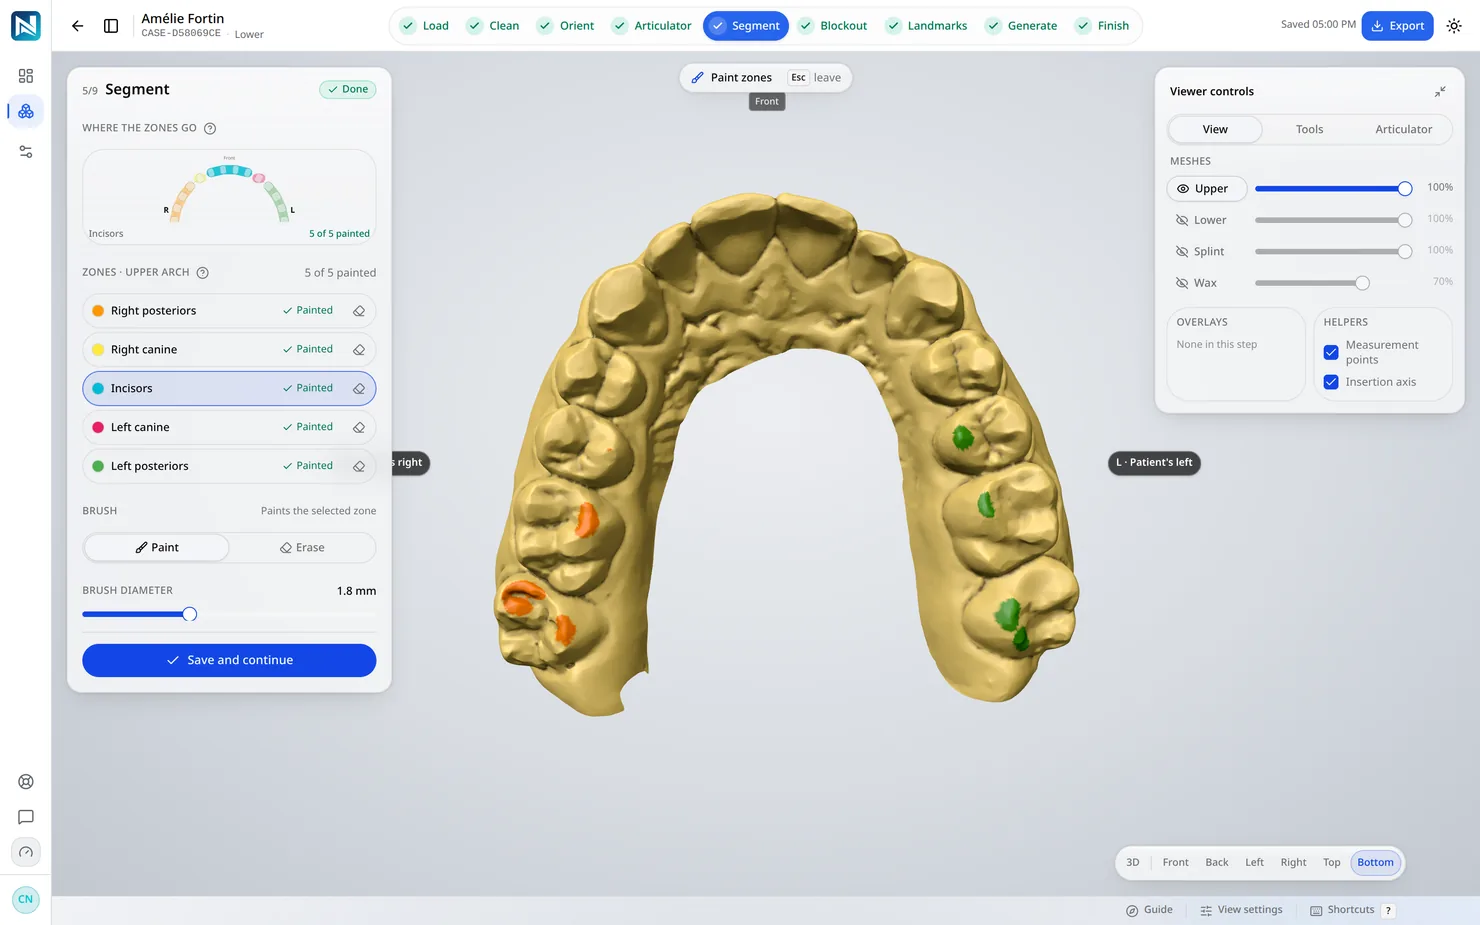
You paint five zones on the opposing arch: two posterior, two canine and the incisors.
Step 6 of 9
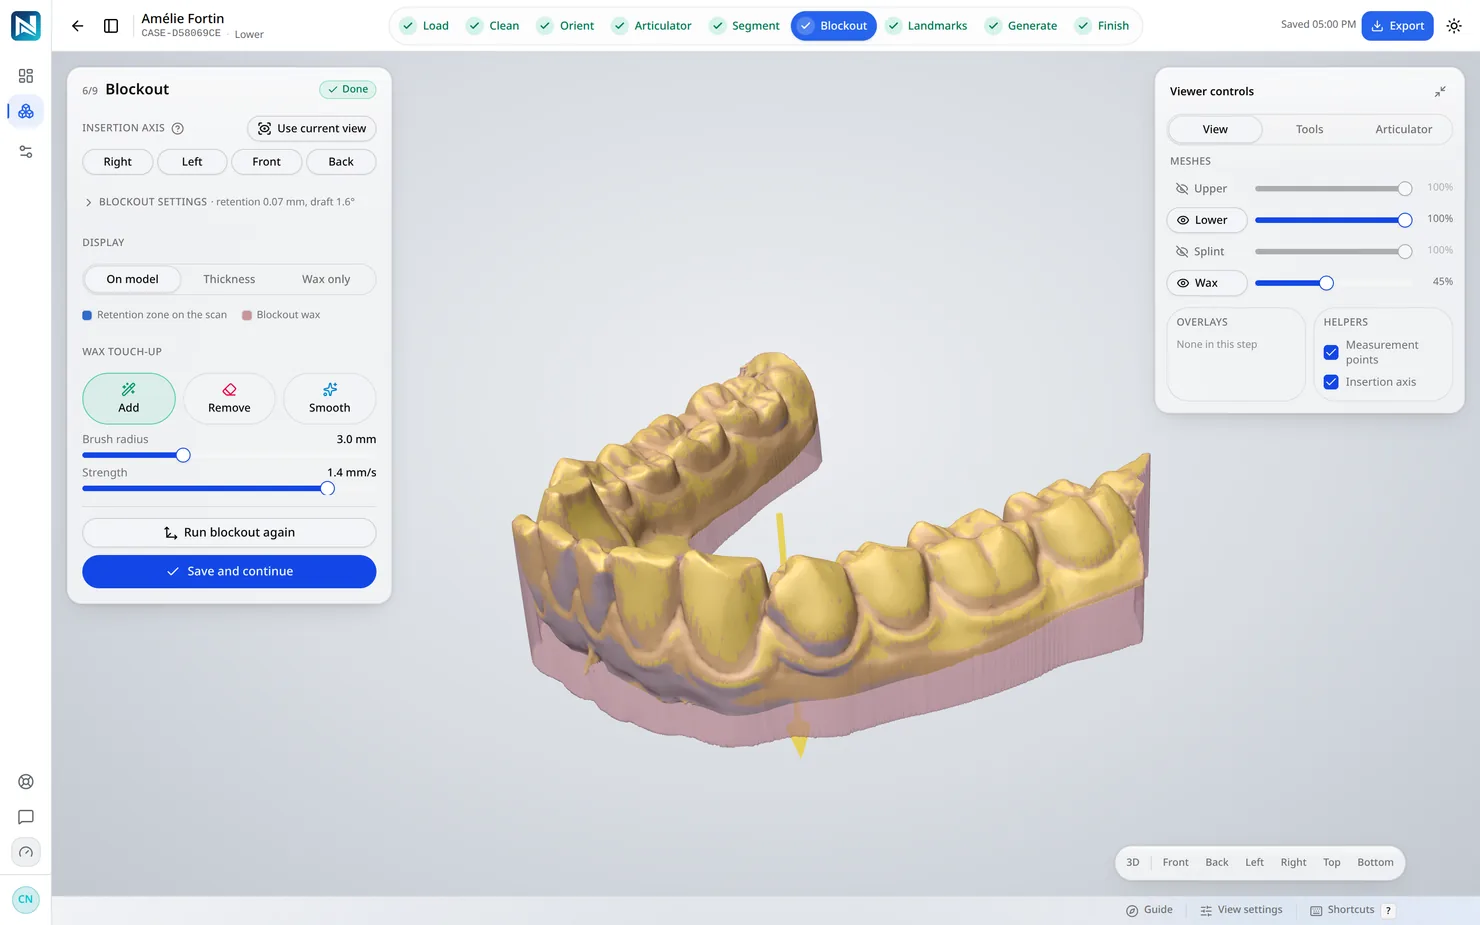
Retention areas are shown in blue on the scan.
Step 7 of 9
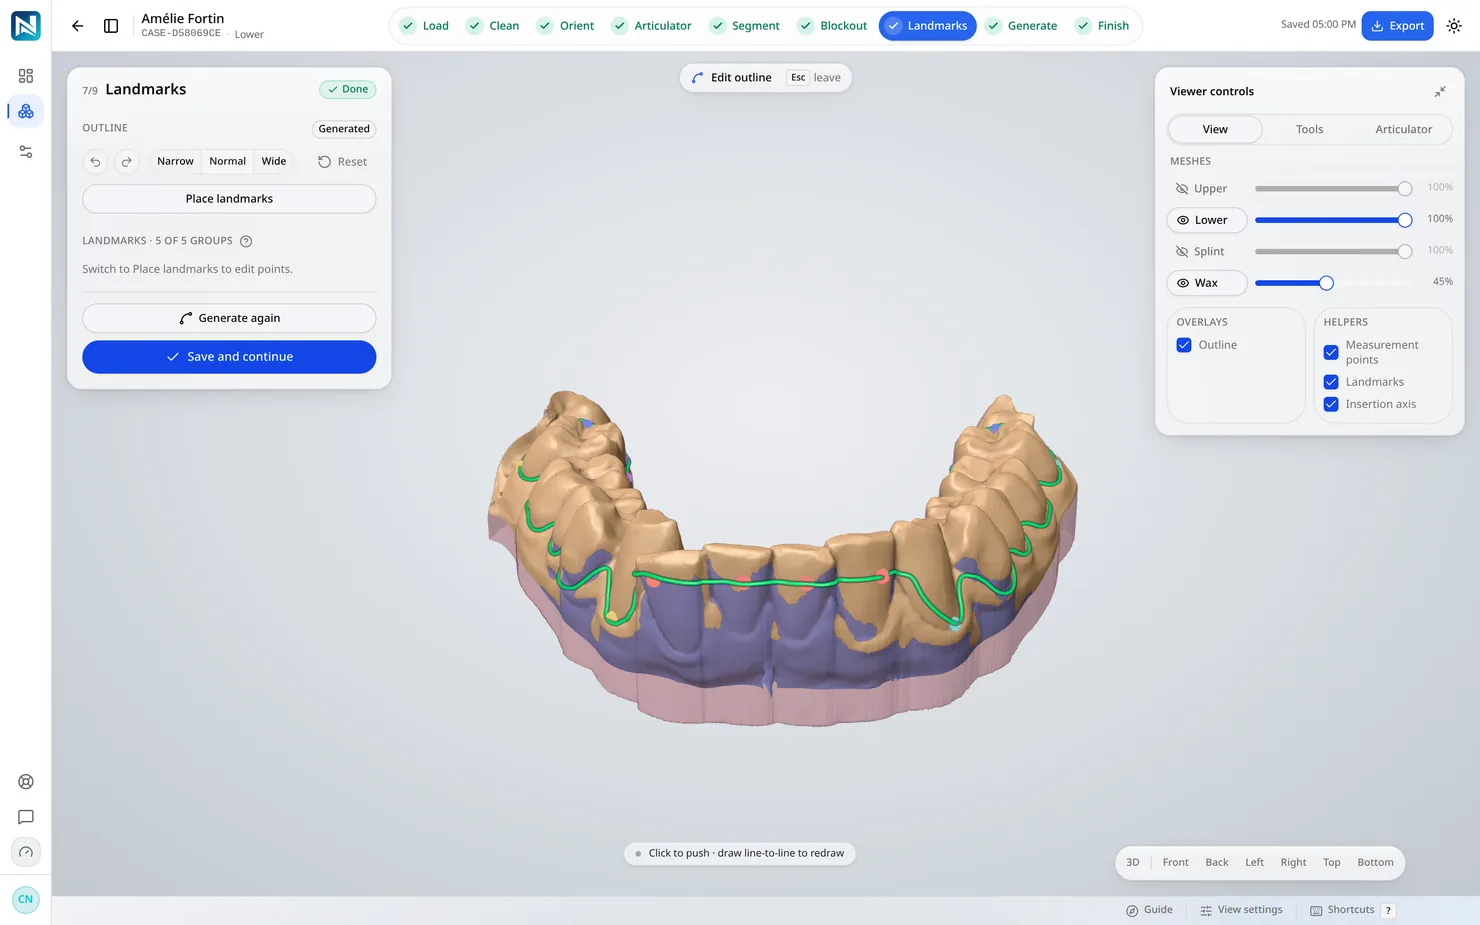
You place landmark points on the teeth; the software traces the splint's outline on the wax.
Step 8 of 9
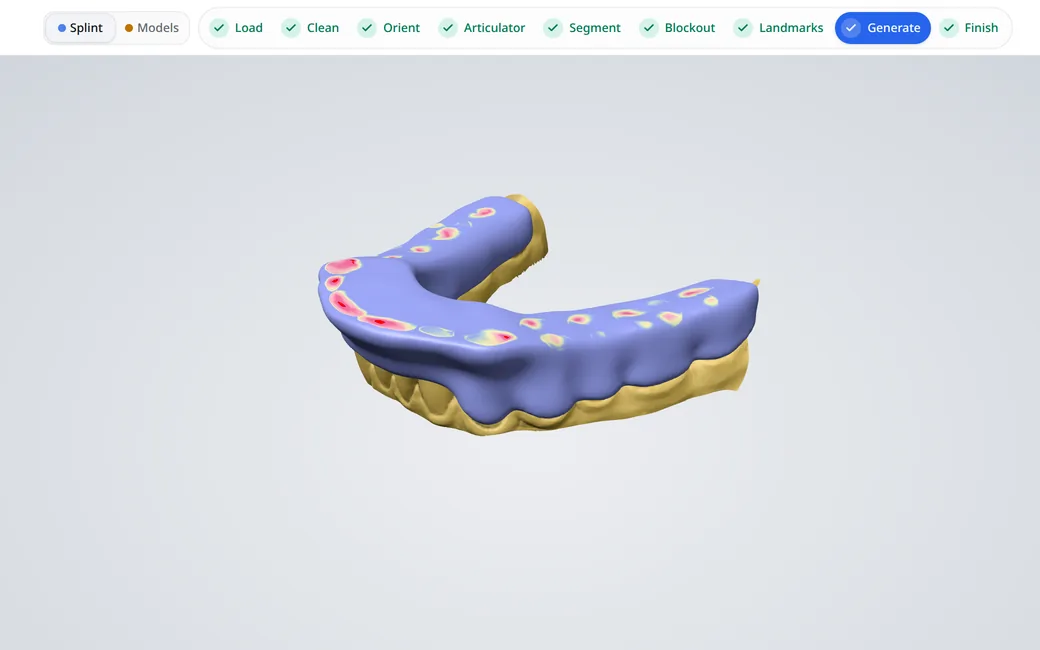
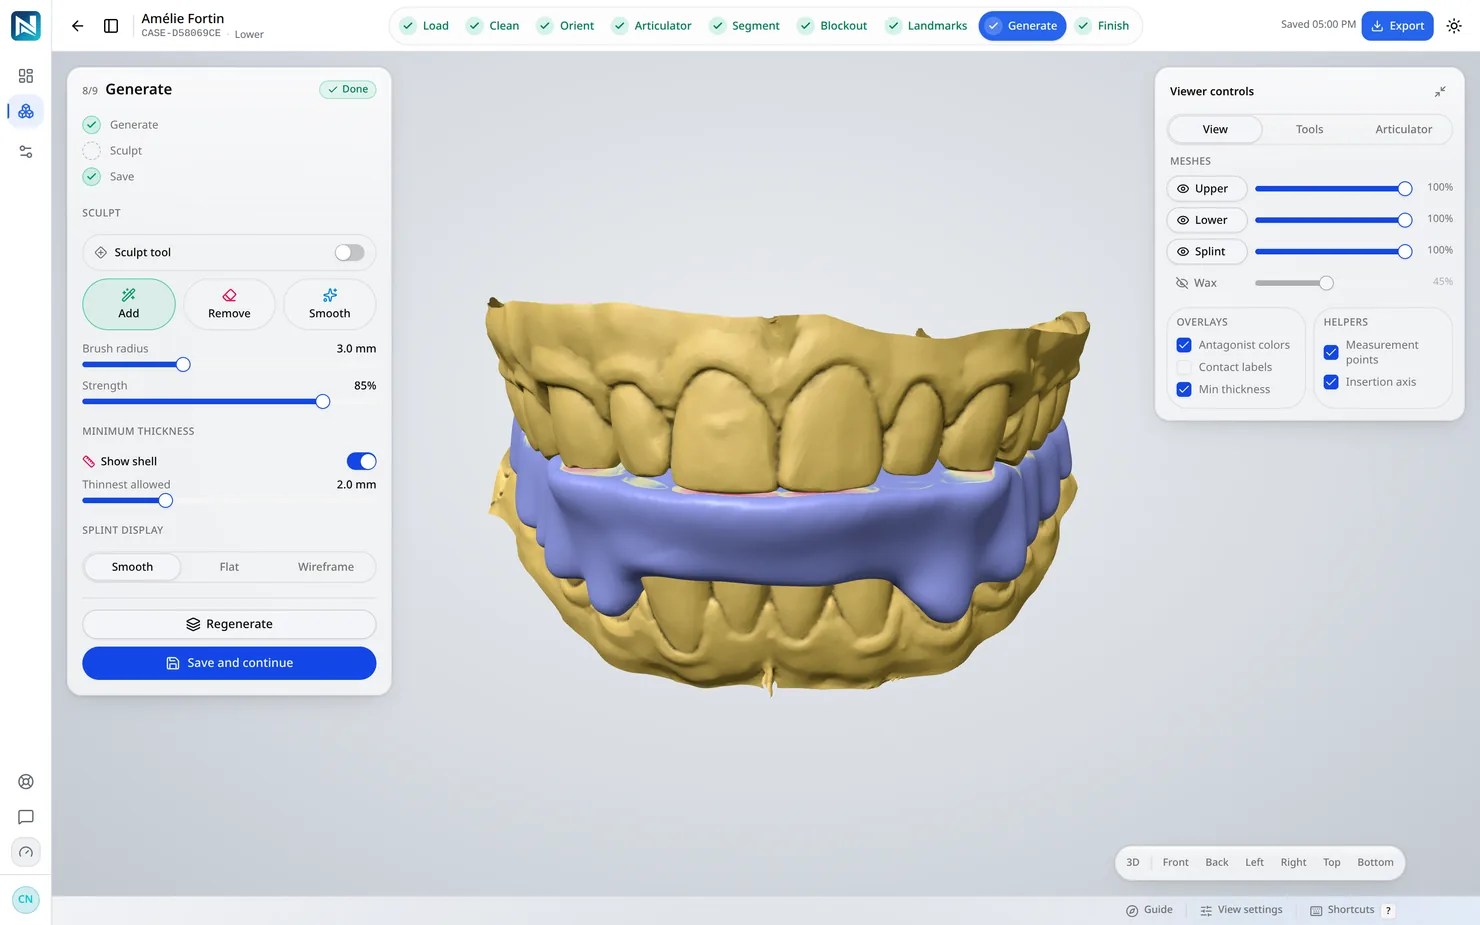
The server builds the splint in a few seconds: occlusal table, contacts, guidance and a border on your outline.
Step 9 of 9
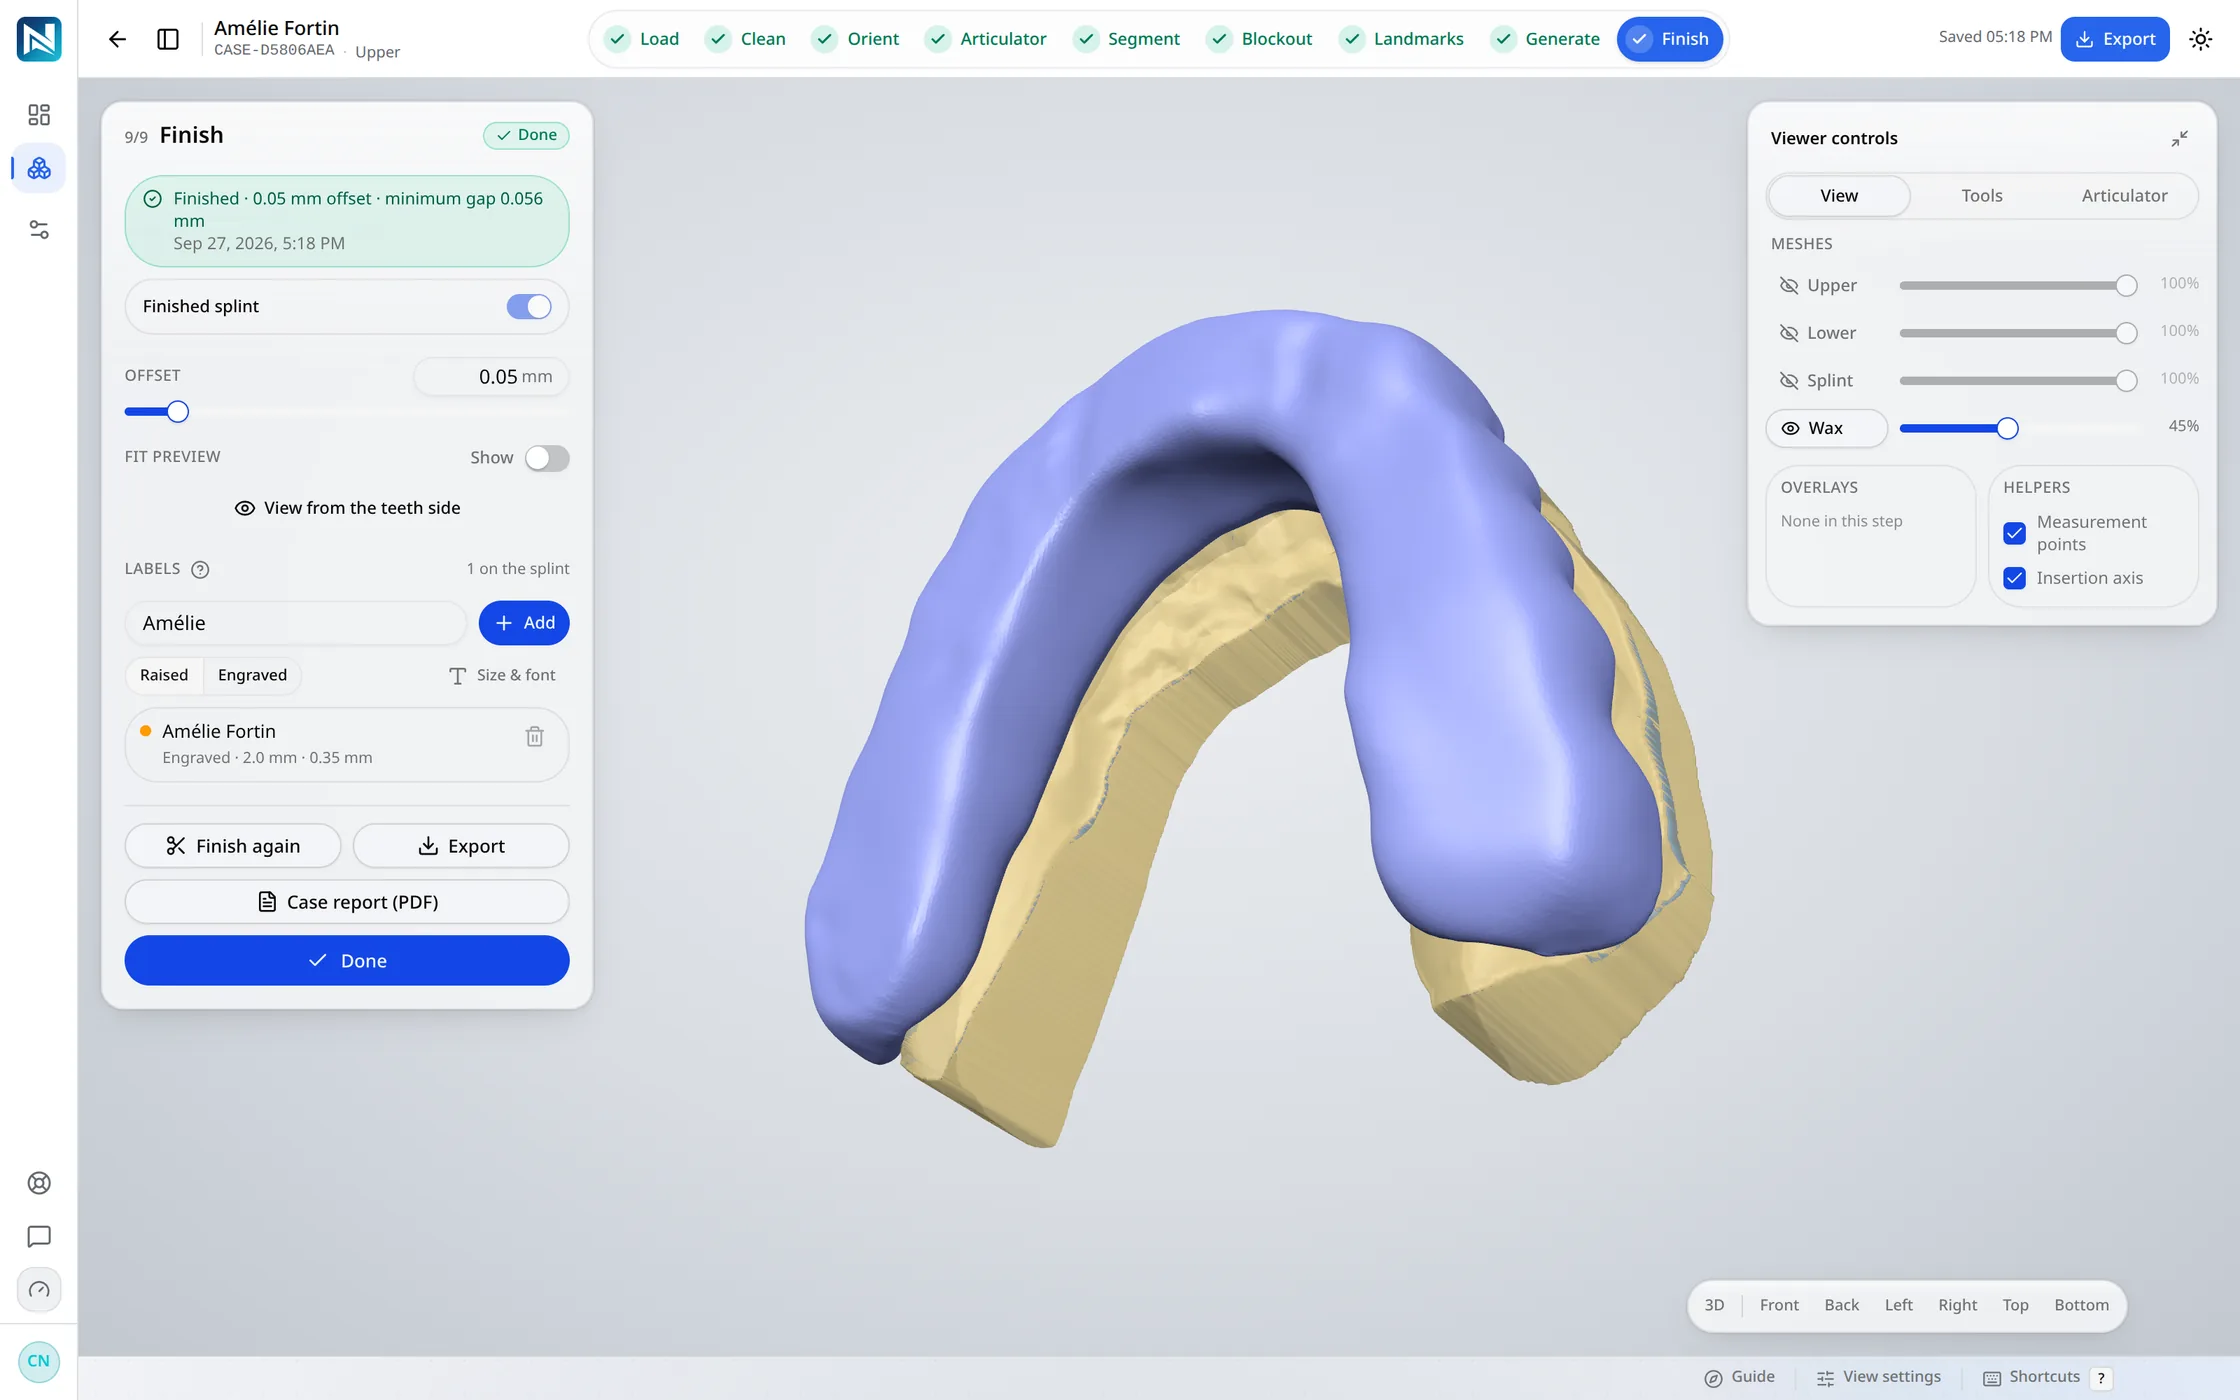
The splint is cut against the wax and fitted to the arch with the gap you choose.
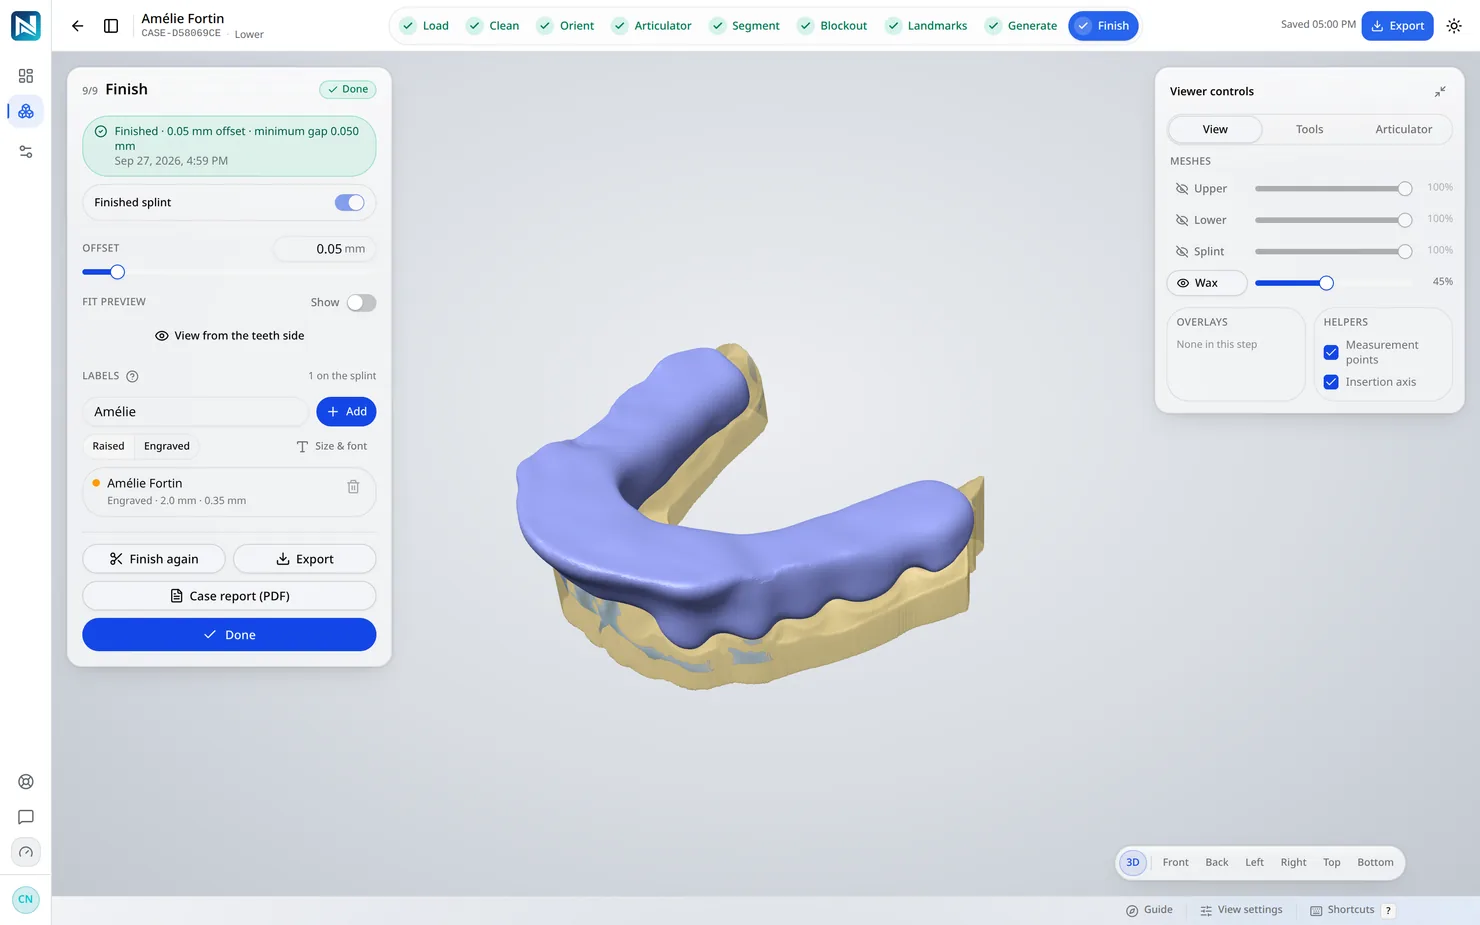
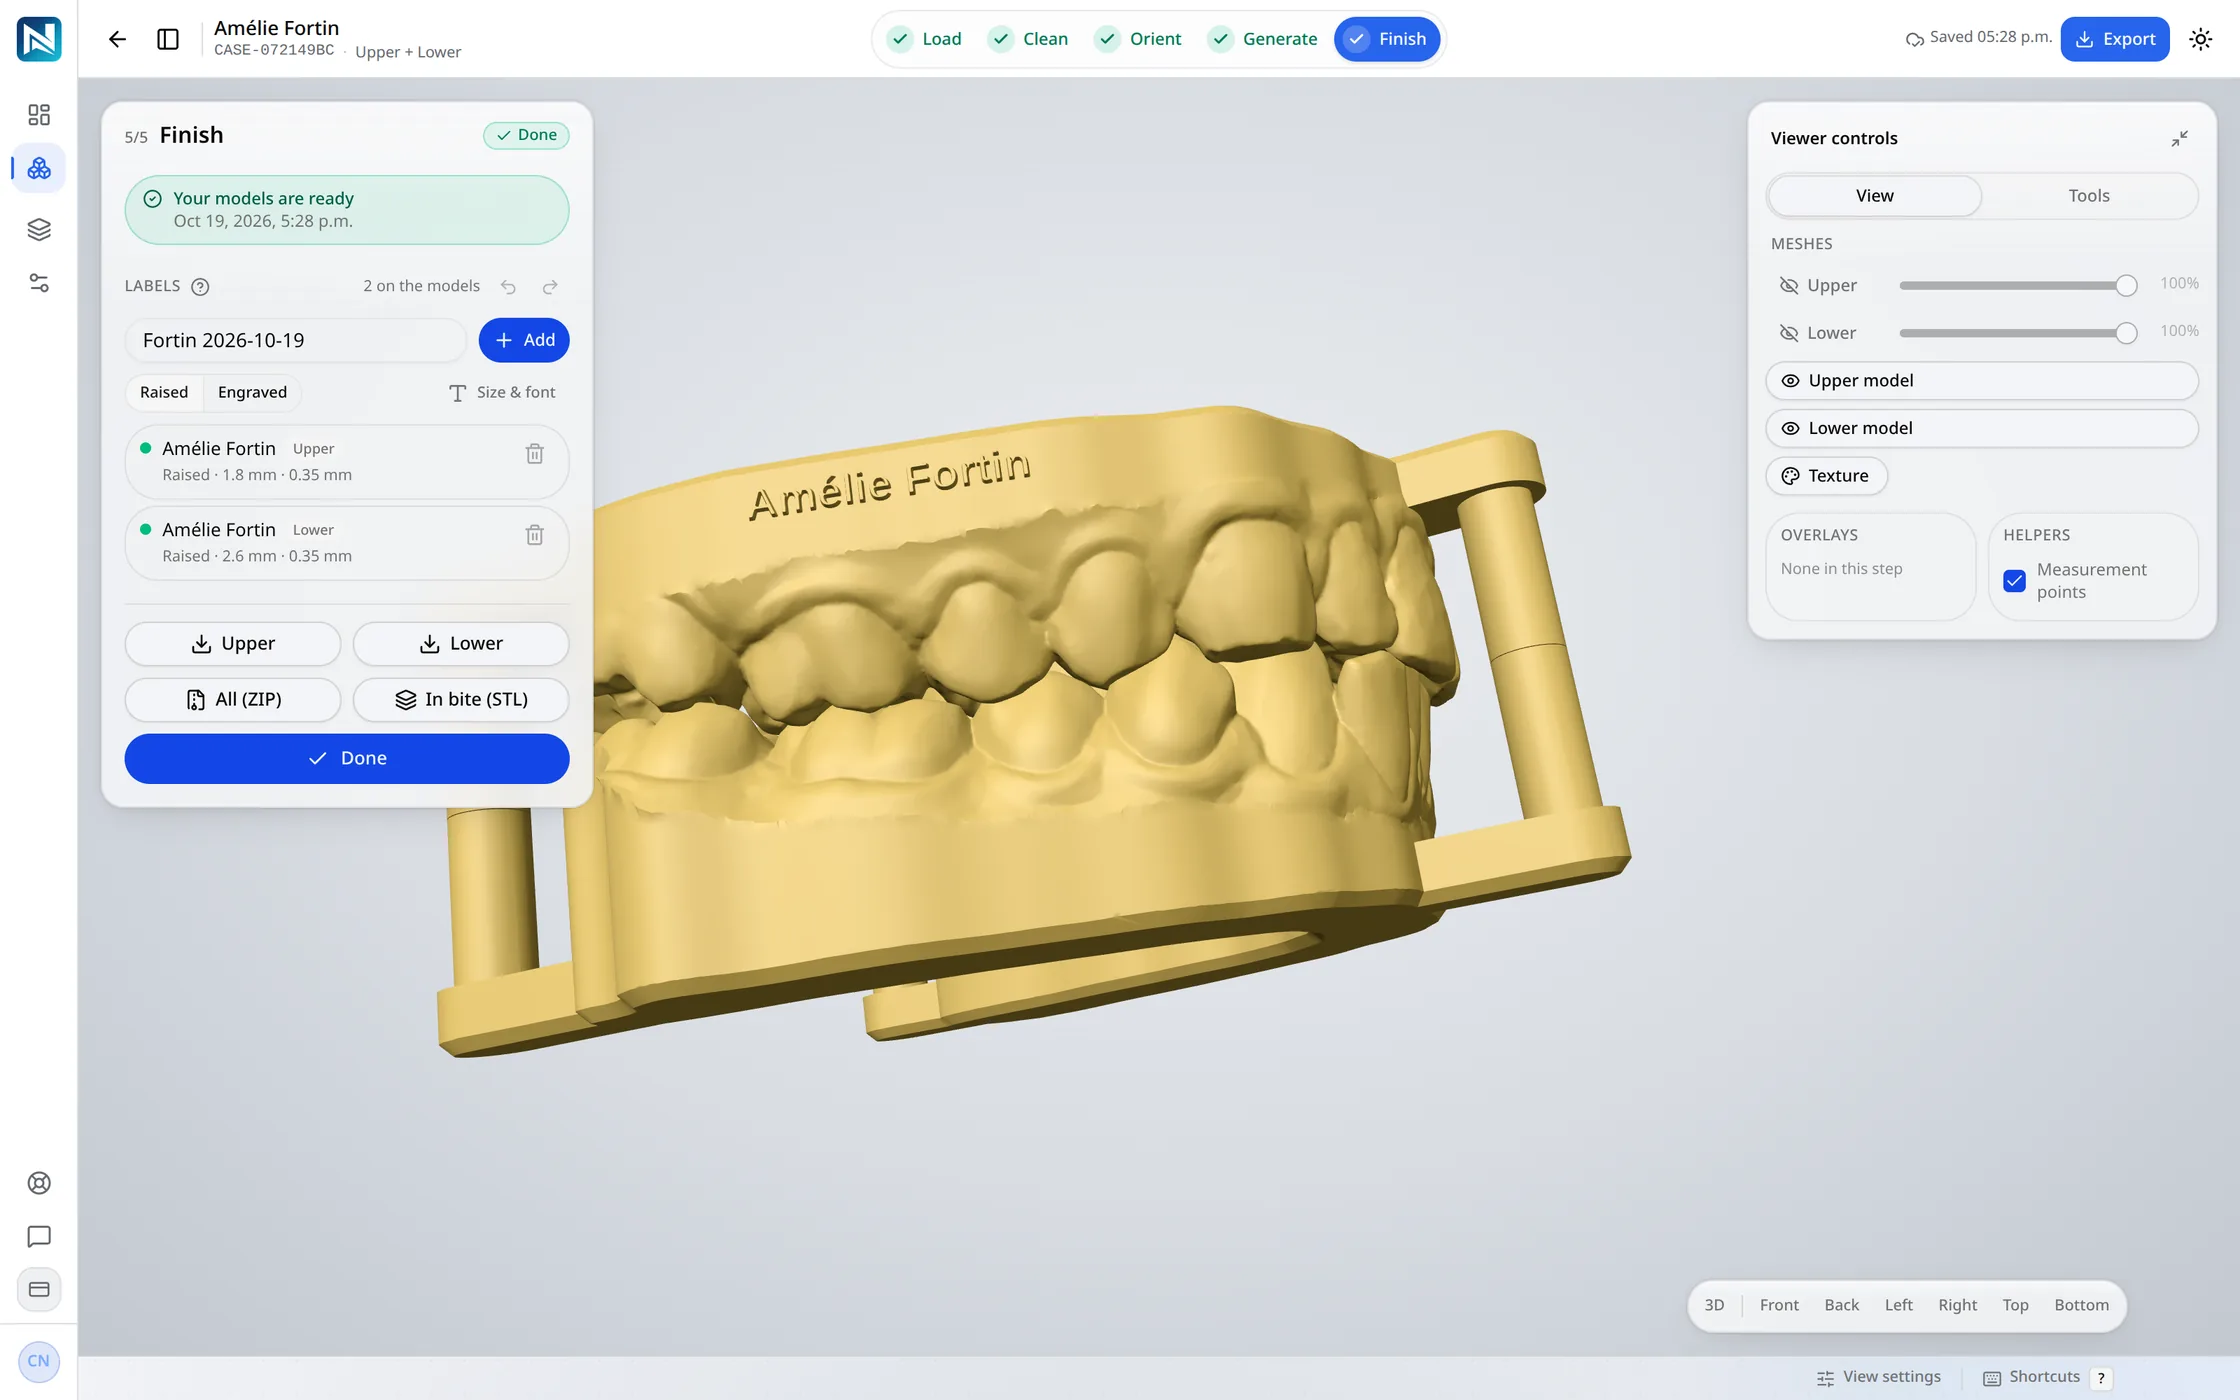
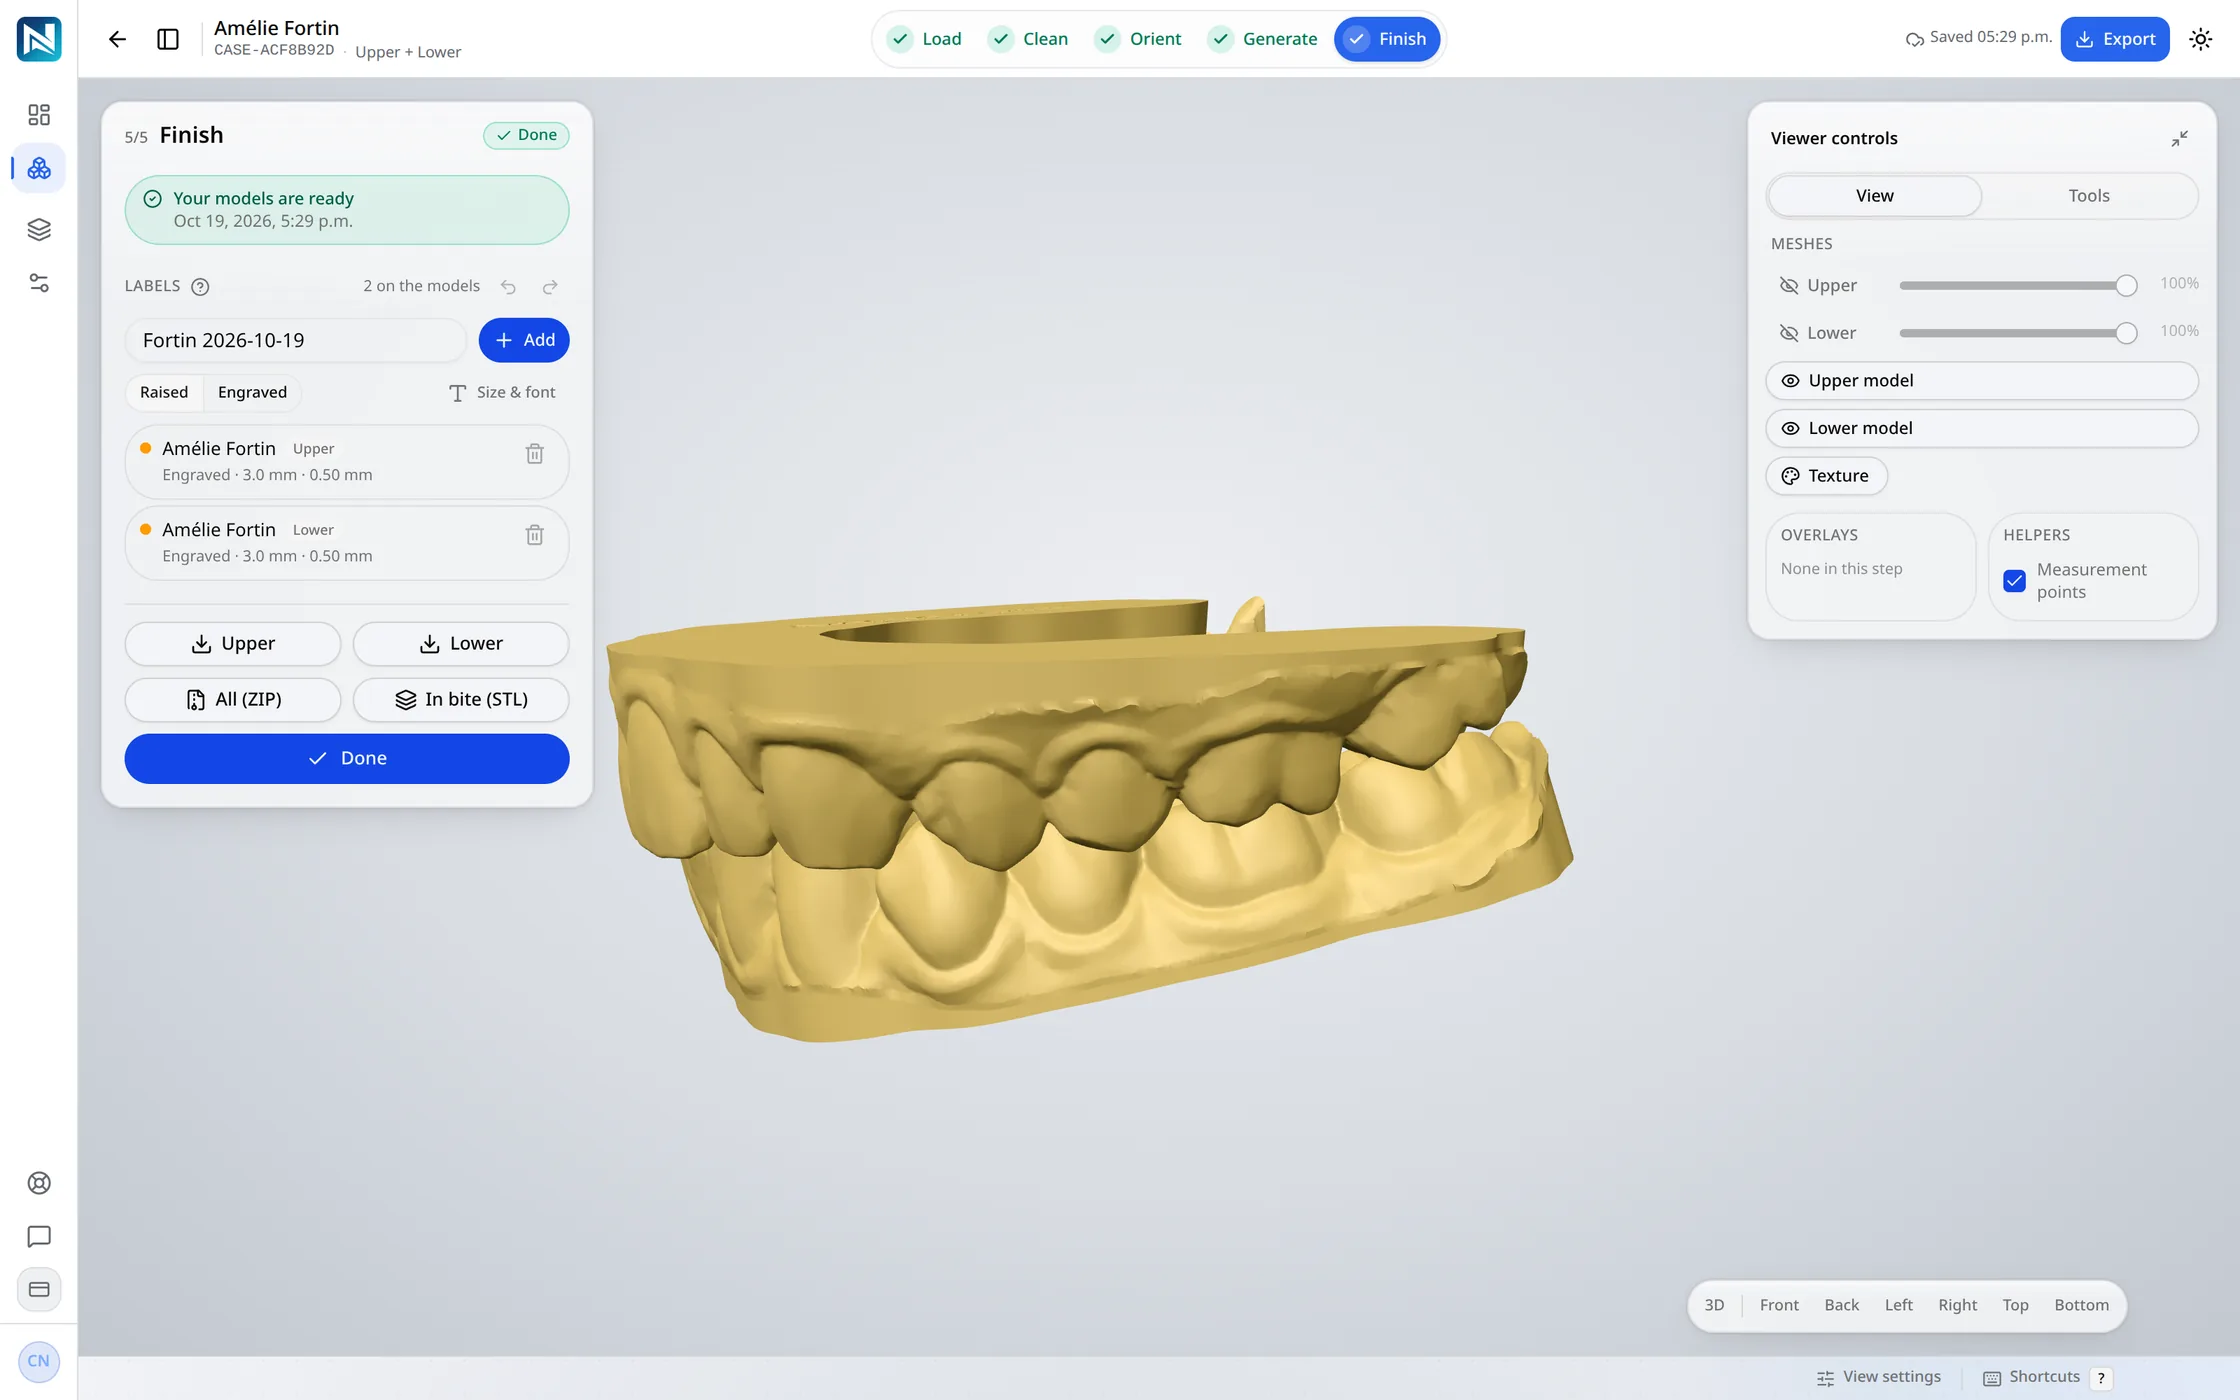
Cleaning, re-running a step and generating a report use no export. An export is counted when you export the final STL; changes made before that do not use another one. A model case goes through five of these steps: load, clean, orient, generate and finish.
Every finished case produces a report: the prescription on a tooth chart, the splint from eight angles, the settings it was built with and the thickness map. Print it for the chart, or send it with the file.
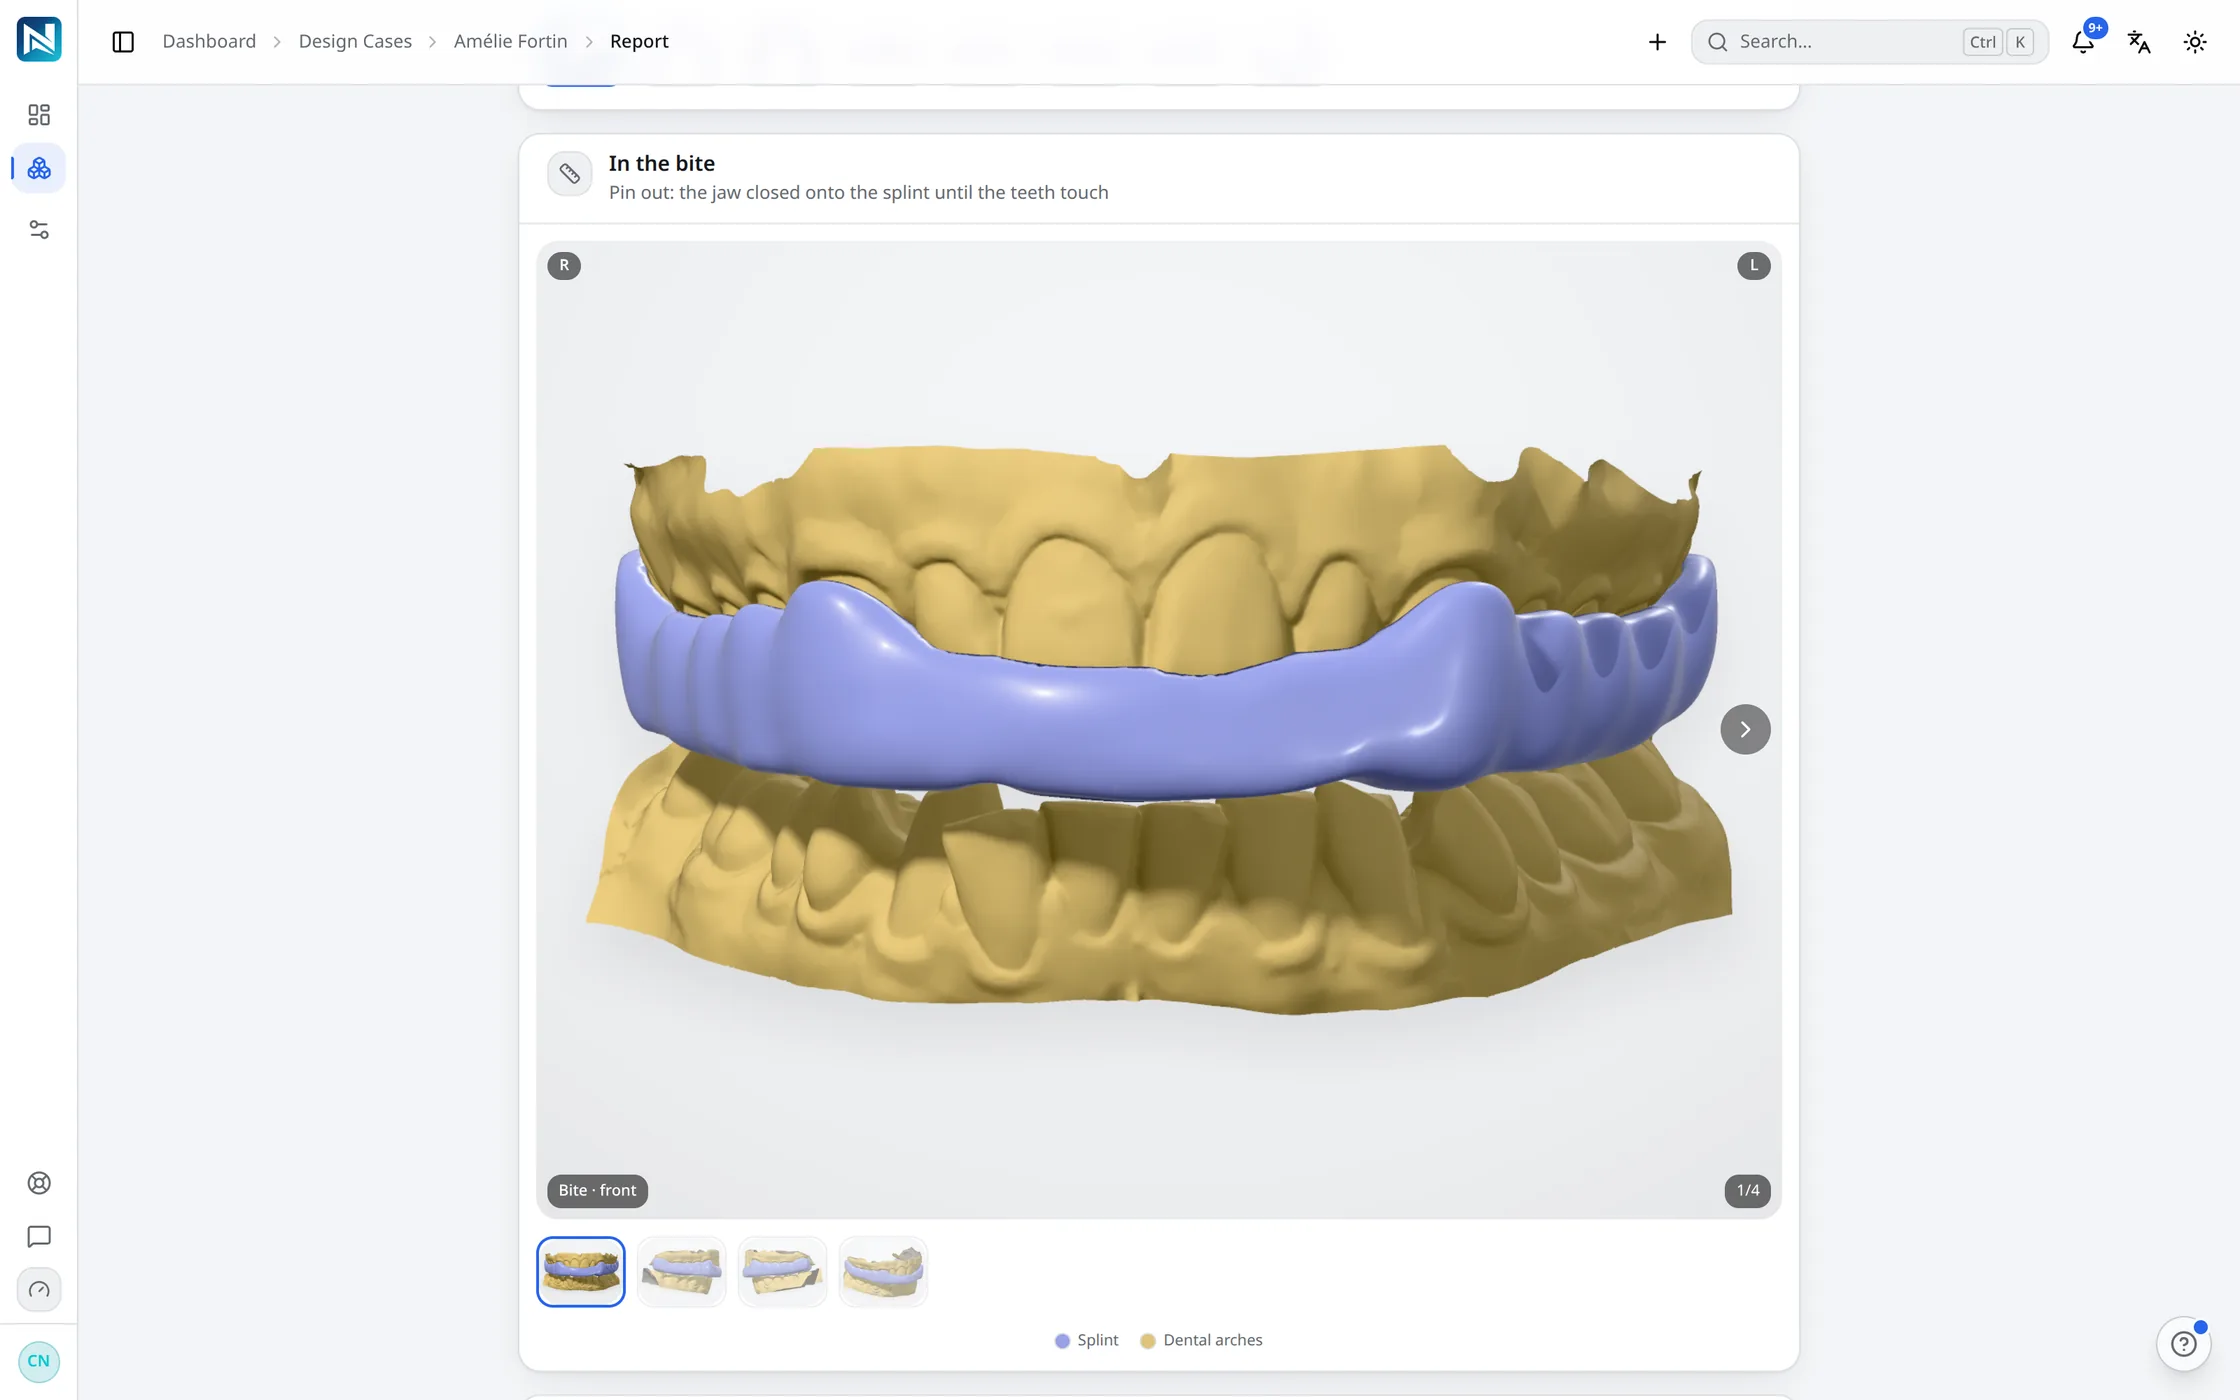
Each step calculates a result and shows it to you. You accept it, correct it with the step's tools, or run the step again.
Nine steps in a fixed order; each one unlocks the next. Anyone trained on it always knows where a case stands.
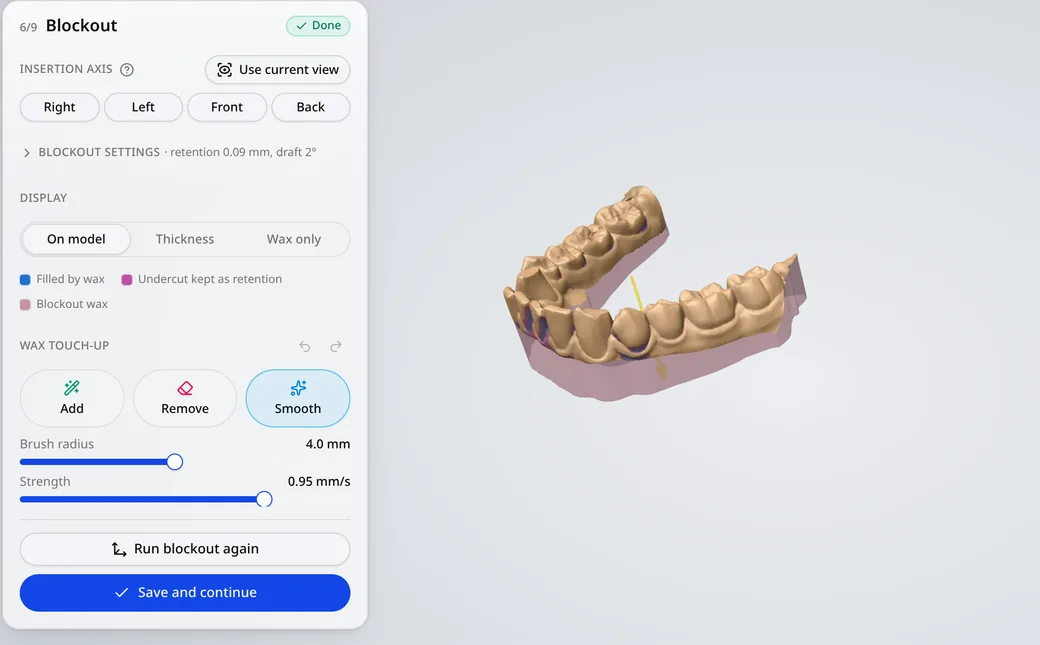
You set the insertion axis, the retention (a few tenths of a millimetre) and the draft angle. The server calculates the wax in a few seconds; you touch it up with the brushes where needed.
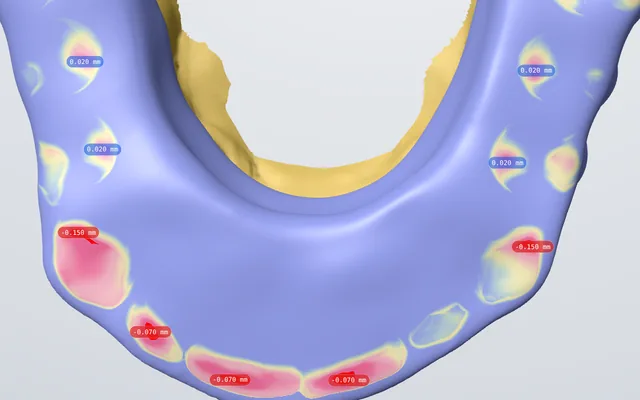
The engine builds the table from the bite, the five zones painted on the opposing arch and the recorded movements. Contacts are shown in colour on the splint, with their values.
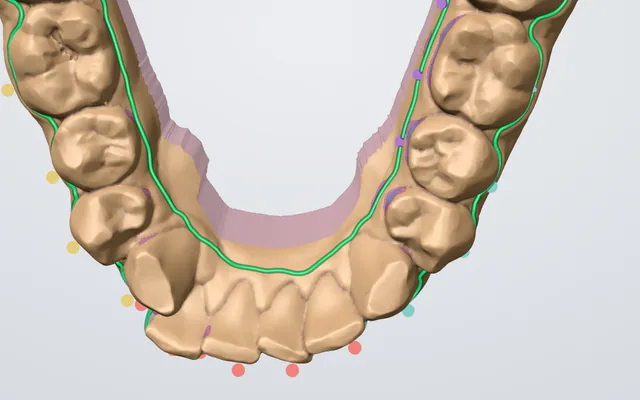
You place landmark points on the teeth; the software traces the outline on the wax and spans a diastema. You can move a point or redraw a section before going on.
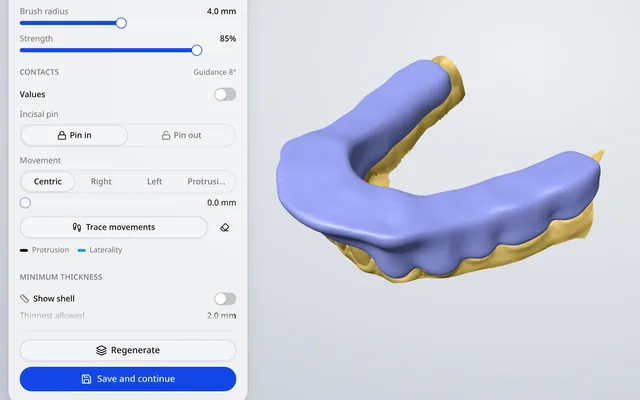
The shell is offset from the blockout wax, not the raw scan. A thickness view shows in red any area thinner than the value you chose.
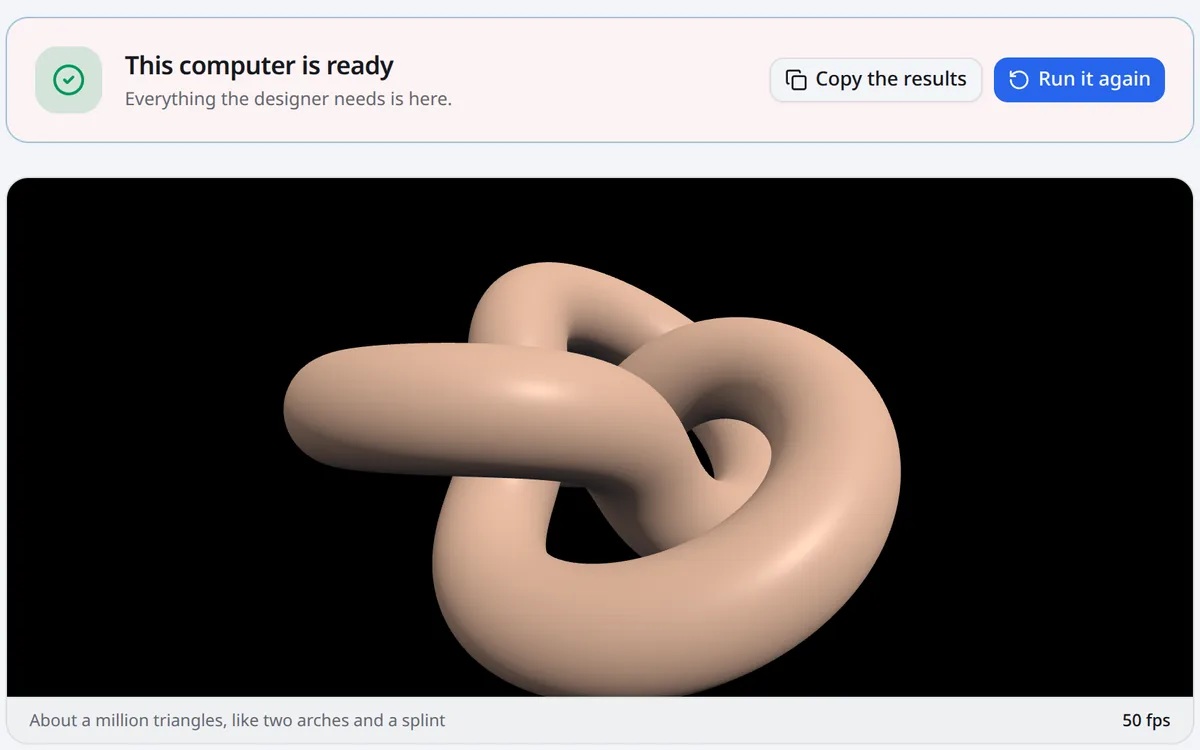
The software runs in a recent browser, with no licence per workstation. A test page checks in a few seconds whether your computer is suitable.
For ten splints a week, about 9 hours in installed software becomes about 1 h 15, at the middle of each range.
Balanced contacts on the canines, a light contact on the incisors, 20 µm on the posteriors, canine guidance in laterality and anterior guidance in protrusion.
In our founder's experience on more than 2,000 Aubé™ splints, the generated table needs fewer touch-ups than the splints he designed by hand. One person's experience, not a study.
Nine steps in a fixed order; anyone trained on it knows where a case stands, and any step can be run again.
How the two are set up, line by line. No particular product: installed dental CAD in general.
| What | Installed desktop CAD | NexorCAD |
|---|---|---|
| Time per splint, raw scans to STL | 20 min – 1 h 30 | 5 – 10 min |
| Undercut blockout | Blocked out by eye | Calculated along the insertion axis, with the retention you set |
| Occlusal table | Built by hand | Generated from the bite, the five zones and the recorded movements |
| Splint border | Drawn by hand | Traced on the wax from your landmark points |
| Minimum thickness | Checked by eye | Offset from the blockout wax, thinner areas shown in red |
| Where it runs | Installed on each workstation | In a recent browser, on any computer the test page accepts |
| Updates | Installed computer by computer | Everyone works on the current version |
| Your files | On the workstation that made them | In your workspace, hosted in Québec, exportable at any time |
| Paying | A licence per workstation | A monthly plan; you pay for what you export |
The times are our founder's own, on his own cases, after more than 2,000 Aubé™ splints. Yours will be longer at first.
It is the time our founder measures on his own cases, from the two raw scans to the STL. The steps that take longest by hand, the blockout, the outline and the occlusal table, are calculated by the software; what is left is checking them. Your first cases will take longer.
A hard, full-arch occlusal splint with a flat occlusal table. By default in NexorCAD: in centric occlusion, balanced contacts on the canines, a light contact on the incisors and 20 µm of clearance on the posteriors; canine guidance in laterality and anterior guidance on the incisors in protrusion, with no posterior contact in movement.
For the hard night guard, yes: a full-arch occlusal splint, upper or lower, which is what many night guard prescriptions mean. It does not design soft or dual-laminate guards.
No. It designs only the occlusal splint, arch models and thermoforming models. You keep your current software for crowns, bridges and dentures.
Any intraoral scanner that exports the upper and lower arches as STL or PLY (iTero, Medit, Primescan and others). The file is read as it is, with no conversion.
No. NexorCAD produces a print-ready STL. You print it yourself or send it to whoever prints for you.
Try it on your own cases
14 days and 75 credits free on your own scans: three splints. The sample case uses none.
No credit card. Creating the account takes about two minutes.